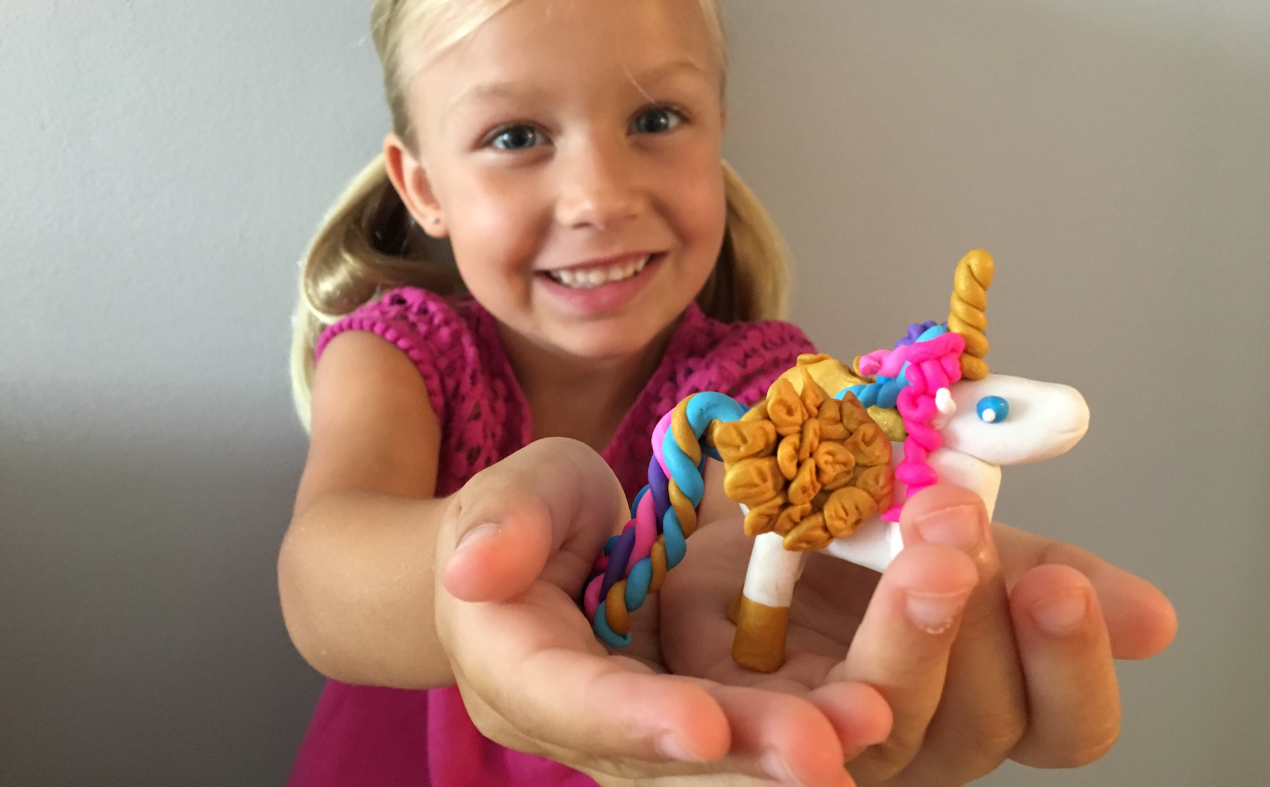
Our resident crafty mama shares her latest DIY tutorial, a cute unicorn from oven-bake clay!
If you feel like the summer is passing you by, I suggest spending a few days at home with three kids while you try to ‘work’. Not only do you realize just how many hours are needed to be filled each day, if you are anything like me, you look for ways to get creative and combine ‘work’ with fun.

The result is this nifty little DIY unicorn that is perfectly on trend and easy enough for kids around age six, although my five-year-old happily served as clay colour mixer and played with our excess product as I control-freaked my way through it.
Let’s get started!
All you need:
Four colours of oven-bake clay (we love this kit! ) And a toothpick

First things first:
Try to ration your white clay as it is the colour that you need most of. Take a small amount and put aside for mixing light pink and light blue. These mixing jobs are great for little ones that aren’t quite old enough to take on a unicorn but want to be involved.


Roll out four small white balls of equal size. These will serve as legs. Then add small gold balls to serve as hooves.


Roll the balls out to sausages and then add the balls to the end of the legs. If you roll the sausage after you attach the ‘hooves’ it will mesh together nicely. Make sure that your legs are fairly thick and sturdy to support the weight of the unicorn.


Next, shape the body and neck of your unicorn into a shape like this.

Shape and add the head.


Using two small white balls, shape the ears and attach.

Now add the legs. Check to see if your legs can support your unicorn. If they are too thin, remove and add clay to add strength.

Now it’s time to make this horse into a unicorn! Roll out a thin length of gold clay. Fold in half and twist to form a horn. Cut to size and attach.


Roll a small blue ball and a teeny tiny white ball to form the eye.

Now it is time for the FUN part.
It’s time to make the hair and wings! Roll out long lengths of dark pink, light pink, purple, light blue and dark blue. We twisted the lengths into curls for the mane and into ‘braids’ (we only used two lengths) for the tail. I added in gold for the tail to make it fabulous!


Unicorn or Pegasus?
Now for the wings. My daughter told me that adding wings would actually make this a pegasus and not a unicorn and refused to take them on, but I like a creative challenge so I continued on to make a pegasus.

Roll out two gold balls and shape them into a leaf. Now roll about a million small balls. Each one needs to be shaped into a leaf and then imprinted with two ‘V’ shapes with a toothpick. Starting at the edge of the wing, layer the feather shapes onto the wings and then attach to the pegasus.


 Bake according to your clay package instructions and enjoy!
Are you a crafty control freak or do you let your kids take charge? Let us know in the comments!
*Opinions expressed are those of the author, and not necessarily those of Parent Life Network or their partners.
Melissa Robertson
Melissa Robertson divides her time between her three daughters and writing for the Parent Life Network. In her 'spare time' she loves to be a total control freak while attempting to do crafts with her girls.

 Sponsored